How to Add and Customize QR Codes in eXPerience 8
The QR Code tool allows you to make your embroidery projects interactive by embedding website URLs, contact information, or plain text messages directly into the design. Follow this guide to learn how to generate, position, and customize QR codes.
Step 1: Insert the QR Code
- Navigate to the Draw shapes list located on the left side of the application window.
- Click on the QR Code tool to activate it.
- Click anywhere on your design workspace to place the QR code.
- To position the code, simply click and drag it to your desired location.
Note: If you need to edit an existing QR code later, simply select the object and click the QR code icon in the toolbar again to reactivate the editing mode.
Step 2: Customize Content and Shape
Once the tool is active, use the Tool Options panel to configure the data and physical structure of the code.
1. Text (Data Entry)
Enter the information you want to encode in the Text box. This can be a website URL (e.g., your portfolio), a short message, or contact details.
- Default: The tool defaults to a link to
wingsxp.com. - Capacity: Press Enter to apply changes.
Useful Tip: Keep your text concise. The length of the text directly affects the size and visual complexity of the QR code. More data requires more physical space for encoding, which increases the stitch count and complexity.
2. Border (Margins)
The Border field controls the whitespace margin around the code.
- Range: Set a value between 1 (smallest margin, one cell wide) and 10 (generous margin, 10 cells wide).
- Why use it? Increasing the border helps the QR code stand out from the rest of the embroidery and makes it significantly easier for phone cameras to scan, especially in cluttered designs.
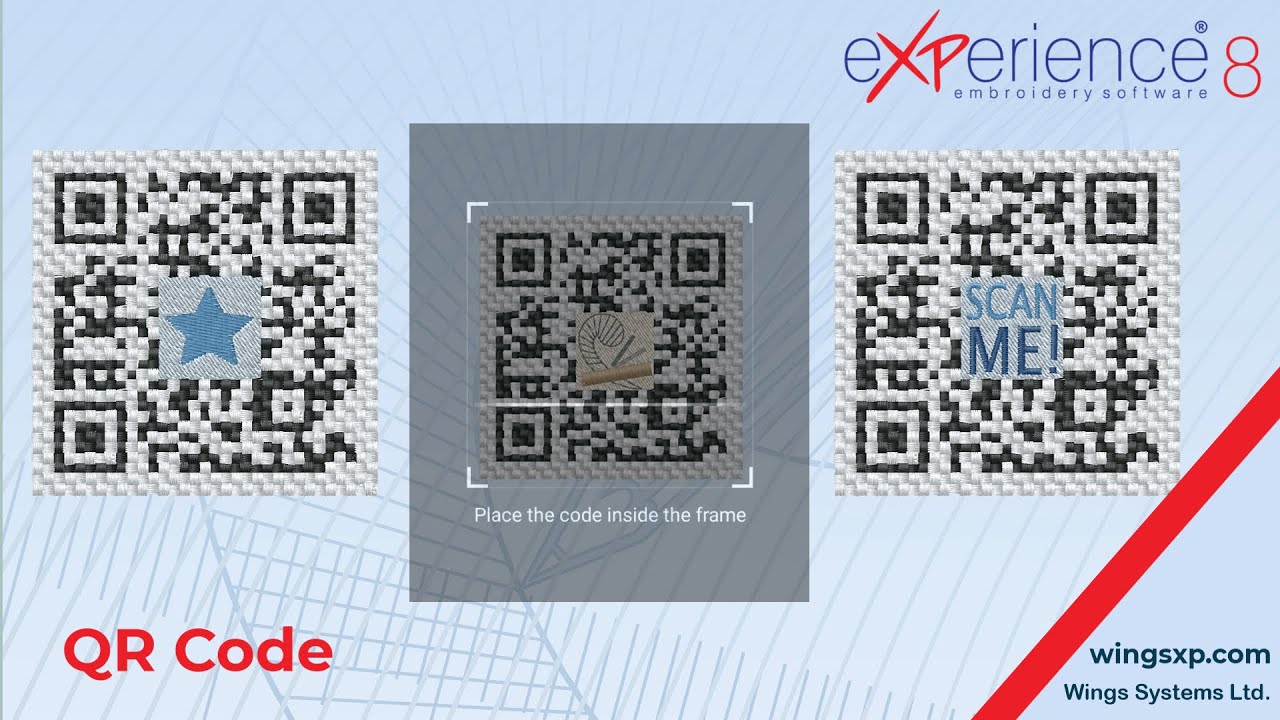
3. Hole (Center Space)
The Hole field creates an empty space in the exact center of the QR code.
- Range: Set a value between 0 (no hole) and 10 (largest possible hole).
- Usage: This space is ideal for inserting a small logo, symbol, or icon without breaking the scanability of the code.
Step 3: Adjust Embroidery Properties
Use the Properties Bar to adjust how the machine will stitch the code.
- Thread Palette: Select the specific thread colors for your design.
- Cell Size: Changing this value adjusts the overall dimensions of the QR code.
- Filled vs. Cross-Stitch: By default, the code is stitched with a fill. If you uncheck the Filled option, the software will use a cross-stitch pattern instead. This is useful for lighter stitching or achieving a different aesthetic texture.
Using Monochrome Mode
The Monochrome setting converts the QR code into a single-color design. It retains only the parts of the code that match the border color and removes all other colors.
⚠️ Critical Tip for Monochrome: When using the Monochrome setting, contrast is key. Ensure that your thread color contrasts sharply with your fabric color (e.g., black thread on white fabric). If there is not enough contrast, the QR code may not be scannable by cameras.
Troubleshooting: Why won’t my QR Code scan?
Embroidering QR codes presents unique challenges compared to printing them. If your camera or scanner cannot read the embroidered code, check the following common issues:
1. Insufficient Contrast
The Issue: The camera cannot distinguish the QR code stitches from the fabric background.
- The Fix: Ensure high contrast. The most reliable combination is dark thread on light fabric (or vice versa). Avoid tone-on-tone colors (e.g., dark blue thread on black fabric).
- Monochrome Setting: If using the Monochrome option, verify that the single thread color stands out sharply against your fabric.
2. The Code is Too Dense (Information Overload)
The Issue: The Text field contains too much data (like a very long URL). This forces the software to create very small, tight stitches that may blur together when embroidered.
- The Fix: Shorten the data.
- Use a URL shortener (like bit.ly) to reduce the character count.
- Increase the Cell Size in the properties bar to give the stitches more room to “breathe.”
3. Missing “Quiet Zone”
The Issue: Other embroidery elements or fabric patterns are crowding the edges of the QR code, confusing the scanner.
- The Fix: Increase the Border value in the Tool Options. A value of 4 or higher is usually safer for embroidery to ensure a clear whitespace margin around the code.
4. Fabric Distortion (Push and Pull)
The Issue: The fabric has shifted or puckered during stitching, turning the perfect square of the QR code into a rhombus or trapezoid. QR scanners require the code to be relatively square.
- The Fix:
- Stabilizer: Ensure you are using adequate backing (stabilizer) for your specific fabric type to prevent shifting.
- Hooping: Ensure the fabric is hooped tightly and evenly.
5. Stitch Definition
The Issue: The stitches are sinking into the fabric (especially on pile fabrics like towels or fleece), or the Cross-stitch style is too thin.
- The Fix:
- If using Cross-stitch (Filled unchecked), try switching to Filled mode for a solid, bolder look.
- If embroidering on fluffy fabric, use a water-soluble topping to keep the stitches sitting on top of the fabric pile.
eXPerience Facebook Page
Happy crafting and don’t forget to share your creations with us in the
eXPerience Facebook Page!