How to Adjust Letter Spacing and Position in eXPerience 8 – Level Pilot
In eXPerience 8 embroidery software, you have full control over the layout of your lettering. This guide covers how to transform text objects, adjust the spacing between characters and lines, and precisely position individual letters.

Step 1: Apply General Text Transformations
Text objects in eXPerience 8 function just like any other standard design object.
- Select your text object on the workspace.
- Use the standard object handles to quickly rotate, slant, scale, or stretch your lettering as needed.
Step 2: Adjust Character Spacing and Placement
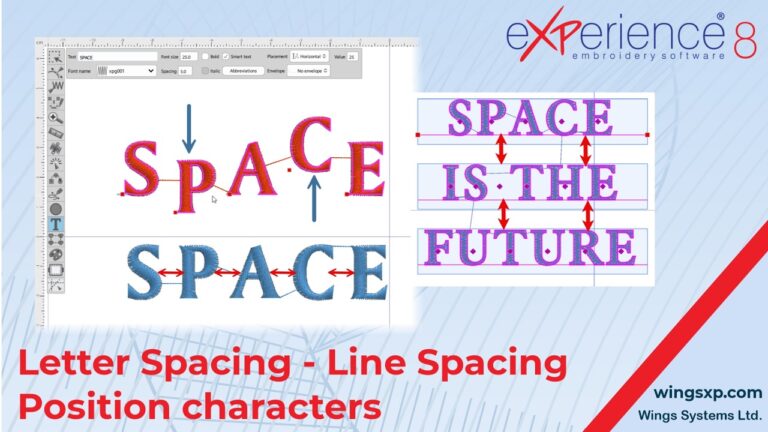
You can easily change the distance between letters or adjust their specific placement using two different methods:
- Using Handles: Enter text editing mode to reveal the text handles. Click and drag these handles to manually move individual characters to your desired position.
- Using Specific Values: To apply a uniform distance between all letters, locate the character spacing field in your text properties and type in a specific numerical value.
Step 3: Manage Multi-Line Text and Orientations
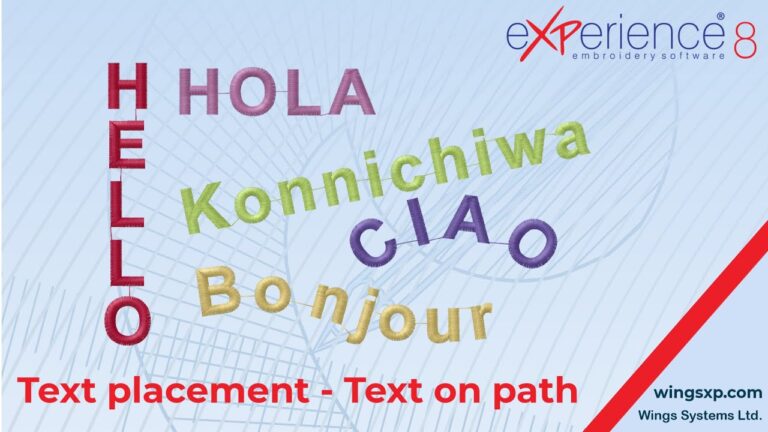
The way you create multiple lines of text depends on the orientation style you have selected for your lettering:
- Horizontal or Vertical Orientation: Simply press the Enter key on your keyboard while typing to drop down and start a new line.
- On-Line Segment or On-Arc Orientation: The length of the line or arc acts as a fixed boundary. When your typed text reaches the end of that boundary, the software will automatically wrap it to the next line.
Useful Tip: Standard alignment and placement options (like left, center, or right alignment) remain fully available regardless of your chosen text orientation.
Step 4: Adjust Vertical Line Spacing
When working with multi-line text blocks, you can easily control the gap between the lines.
- Locate the V spacing (Vertical Spacing) field in your text properties.
- Type a new value to increase or decrease the distance between your lines of text.
Useful Tip for Quick Adjustments: Hover your mouse cursor directly over the V spacing value box. While hovering, you can simply scroll your mouse wheel or use the up and down arrow keys on your keyboard to rapidly adjust the spacing while watching the text update in real-time.
Step 5: Fine-Tune with the Node Editor
For the highest level of precision and customization, use the Node Editor to adjust spacing and positioning.
- Select your text and activate the Node Editor tool.
- Select the specific nodes associated with an individual character.
- Drag the character to a completely new position independently from the rest of the word.
Understanding Basic Text Transformations:
Before diving into specific letter adjustments, remember that text objects in eXPerience 8 can be manipulated like any other standard object. This means you can:
- Rotate your text.
- Slant your text.
- Scale your text.
- Stretch your text.
Method 1: Adjusting Letter Spacing and Position using Text Options (Red Handles and Value Input)
This method allows for quick adjustments to individual characters and overall spacing.
- Add or Edit Text: Begin by either adding a new text object or selecting an existing one to enter edit mode.
- Utilize Red Handles for Individual Character Movement:
- When your text object is selected or in edit mode, you will see red handles associated with the text.
- Click and drag these red handles to move individual characters within the text object to your desired position.
- Adjust Distance Between Characters by Typing a Value:
- Within the text options or properties panel (usually accessible when text is selected or being edited), locate the setting for character spacing or distance.
- Type a numerical value into this field to uniformly adjust the distance between all characters in the selected text object.
Method 2: Adjusting Positioning and Spacing using the Node Editor
The Node Editor offers more precise control over the placement of individual characters.
- Select the Text Object: Click on the text object you wish to modify.
- Start the Node Editor: Access the Node Editor tool. The specific icon or menu item may vary, but it’s typically found in the main toolbar or by right-clicking the object.
- Manipulate Individual Character Nodes:
- Once the Node Editor is active for your text object, you will see individual nodes associated with each character.
- Click and drag these nodes to change the position of each character independently. This allows for fine-tuned adjustments to create custom layouts and spacing effects.
By utilizing these methods, you can effectively control the spacing and positioning of letters within your eXPerience 8 embroidery designs, ensuring your text appears exactly as you envision it.
eXPerience Facebook Page
Happy crafting and don’t forget to share your creations with us in the
eXPerience Facebook Page!