How to Apply an Envelope to Text in eXPerience 8
The Envelope feature in eXPerience 8 allows you to reshape text so that it follows a predefined form. This is useful when you want lettering to curve, taper, expand, or otherwise fit into a particular shape while keeping the text editable.
This tutorial explains how to apply an envelope to a text object, adjust its intensity, use it with supported text placements, and remove it when needed.
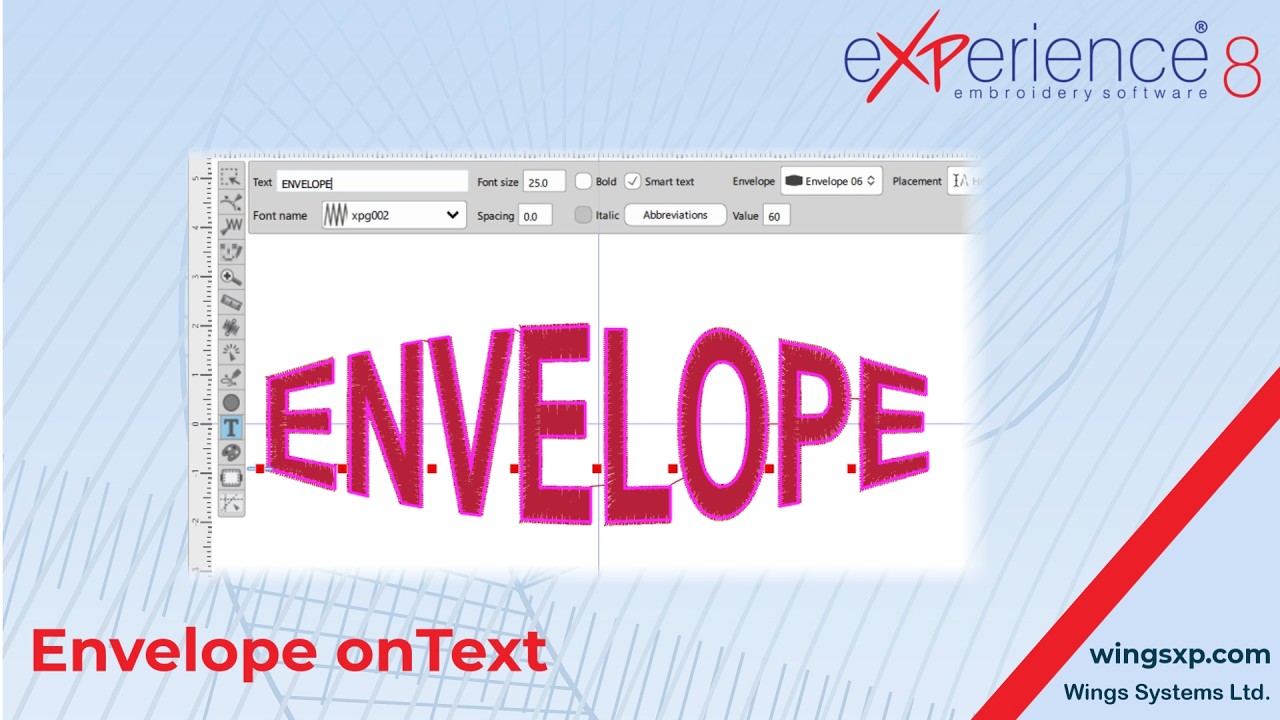
Step 1: Add a Text Object
- Create or select a text object in your design.
- Open the Tools options for the selected text.
You will see the Envelope option among the available text tools.
Tip: If the Envelope option is unavailable, check the text placement type first. Envelope works only with supported line-based placements.
Step 2: Use a Supported Text Placement
The Envelope feature is available only for LINE placements, including:
- Horizontal
- On-line Segment
- Vertical
If your text is using another placement type, change it to one of the supported line placements before applying an envelope.
Tip: When troubleshooting a disabled Envelope option, the text placement setting is the first thing to check.
Step 3: Open the Envelope Shape Menu
- Locate the Envelope option.
- Expand its drop-down menu.
A selection of predefined envelope shapes will appear.
These shapes determine the overall form into which the text will be fitted.
Step 4: Select an Envelope Shape
- Choose one of the available envelope shapes.
- Click the desired shape.
eXPerience 8 will automatically reshape the text so that it fits within the selected envelope.
You can try different shapes until you find the one that best suits your design.
Tip: The result depends on the length of the text, font, size, and selected envelope. If the first result is not ideal, try another envelope shape or adjust the Envelope value.
Step 5: Adjust the Envelope Value
After selecting an envelope shape, use the Value option to control how strongly the text follows that shape.
- Click in the Value field.
- Enter a value from 1 to 100.
- Press Enter to apply the new value.
The text updates according to the value entered.
Step 6: Understand How the Value Affects the Shape
The Envelope value determines the intensity of the selected shape.
- At 1, the envelope is essentially rectangular.
- As the value increases, the text gradually takes on more of the selected envelope shape.
- At higher values, the effect becomes more pronounced.
Take some time to experiment with different values until the result matches your preference.
Tip: Instead of immediately using a very high value, increase the value gradually. Small adjustments can make a noticeable difference to the final lettering shape.
Step 7: Remove the Envelope
You can remove the envelope at any time and return the text to its original shape.
- Open the Envelope drop-down menu.
- Select No Envelope.
The envelope effect is cleared and the text returns to its original appearance.
Tip: This makes it easy to experiment with different envelope shapes without permanently changing the text.
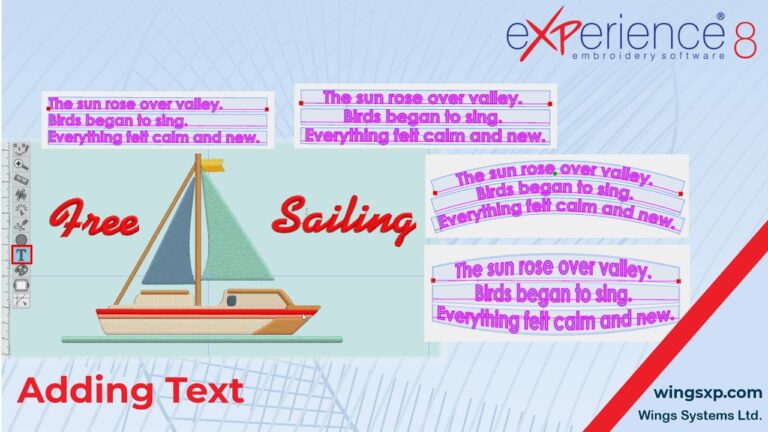
Step 8: Use Envelope with On-line Segment Text
Envelope can also be used with text set to On-line Segment placement.
When entering text:
- Set the placement to On-line Segment.
- Apply the desired Envelope shape.
- Continue typing until the cursor reaches the end of the line.
- Press Enter when you want to add another line.
You can add additional lines while keeping the selected envelope shape applied.
Tip: This is useful when you need several lines of text to maintain the same visual envelope treatment.
Step 9: Apply Envelope to Vertical Text
The Envelope feature can also be applied when the text orientation is set to Vertical.
- Set the text placement to Vertical.
- Open the Envelope menu.
- Select the desired shape.
- Adjust the Value if needed.
The vertical text will be reshaped according to the selected envelope.
Quick Workflow
To quickly apply an envelope to text:
- Create or select a text object.
- Use a supported placement: Horizontal, On-line Segment, or Vertical.
- Open the Envelope drop-down menu.
- Select an envelope shape.
- Enter a Value from 1 to 100.
- Press Enter to apply the adjustment.
- Fine-tune the value until you achieve the desired result.
- Select No Envelope whenever you want to remove the effect.
Useful Tips
- Envelope is available only for supported line-based text placements.
- A value of 1 produces an almost rectangular result.
- Higher values make the selected envelope shape more pronounced.
- Test several values instead of relying on the default result.
- Use No Envelope to quickly restore the text to its original form.
- Envelope can be retained when adding additional lines with On-line Segment text.
- The feature also works with Vertical text, giving you more flexibility when creating lettering layouts.
The Envelope feature in eXPerience 8 provides a quick way to give text a more dynamic shape while maintaining control over the strength of the effect.
eXPerience Facebook Page
Happy crafting and don’t forget to share your creations with us in the
eXPerience Facebook Page!